



Selling online with Shopify is one of the fastest ways to launch an ecommerce business, but building a successful store takes more than simply publishing products. Choosing the right plan, setting up your storefront to optimizing the customer experience, driving consistent sales, every step plays a role in your long-term growth. In this guide, you’ll learn how to sell on Shopify, including the essential setup process, practical selling strategies, and proven tips to help you sell with Shopify more effectively.
Understanding selling on Shopify
Selling on Shopify means running your online store, checkout, payments, inventory, and marketing through a single hosted commerce platform instead of stitching together separate tools for a website, a shopping cart, a payment processor, and an inventory system. When you sell with Shopify, you get a pre-built, secure storefront that you customize with themes and apps rather than code from scratch, plus a backend admin panel where you manage every part of the business.
Key benefits of selling on Shopify
All-in-one ecommerce platform
One of the biggest advantages of selling on Shopify is that everything you need to run an online store is available in one place. Instead of managing separate providers for hosting, security, payments, and ecommerce functionality, Shopify combines these essentials into a single platform. Every plan includes reliable hosting, a free SSL certificate, unlimited product listings, and built-in commerce tools, allowing you to spend less time on technical setup and more time growing your business.
High-converting checkout experience
Shopify’s checkout is designed to make purchasing as simple and seamless as possible. Fast loading speeds, a streamlined checkout flow, and support for multiple payment methods help reduce cart abandonment and encourage more visitors to complete their purchases. For many merchants, this translates into higher conversion rates without requiring additional development work.
Sell across multiple channels
Sell with Shopify isn’t limited to your online store. From a single admin dashboard, you can manage sales across your website, Shopify POS for in-person transactions, social media platforms, online marketplaces, and other supported sales channels. Inventory, orders, and customer information stay synchronized automatically, making it much easier to manage your business as you expand to new channels.


Shopify Pricing: what it costs to sell online with Shopify
Shopify offers a free 3-day trial with no credit card required, and after the trial most plans start at just $1 per month for the first three months before switching to standard pricing. Here’s what the four core plans look like once you’re on standard pricing:
| Basic | Grow | Advanced | Plus |
| $39/mo ($29/mo billed yearly) | $105/mo ($79/mo billed yearly) | $399/mo ($299/mo billed yearly) | From $2,300/mo |
| Card rate: 2.9% + 30¢ online | Card rate: 2.7% + 30¢ online | Card rate: 2.5% + 30¢ online | Most competitive card rates |
| No additional staff accounts | Up to 5 staff accounts | Up to 15 staff accounts | Unlimited staff accounts |
| Best for: solo entrepreneurs just starting out | Best for: small teams ready to scale | Best for: growing brands selling internationally | Best for: complex, high-volume businesses |
For most people just starting to sell online with Shopify, Basic is enough to launch a fully functional store. You’d typically move up to Grow or Advanced once you need more staff accounts, deeper reporting, or lower transaction fees at higher sales volume.
How to sell on Shopify
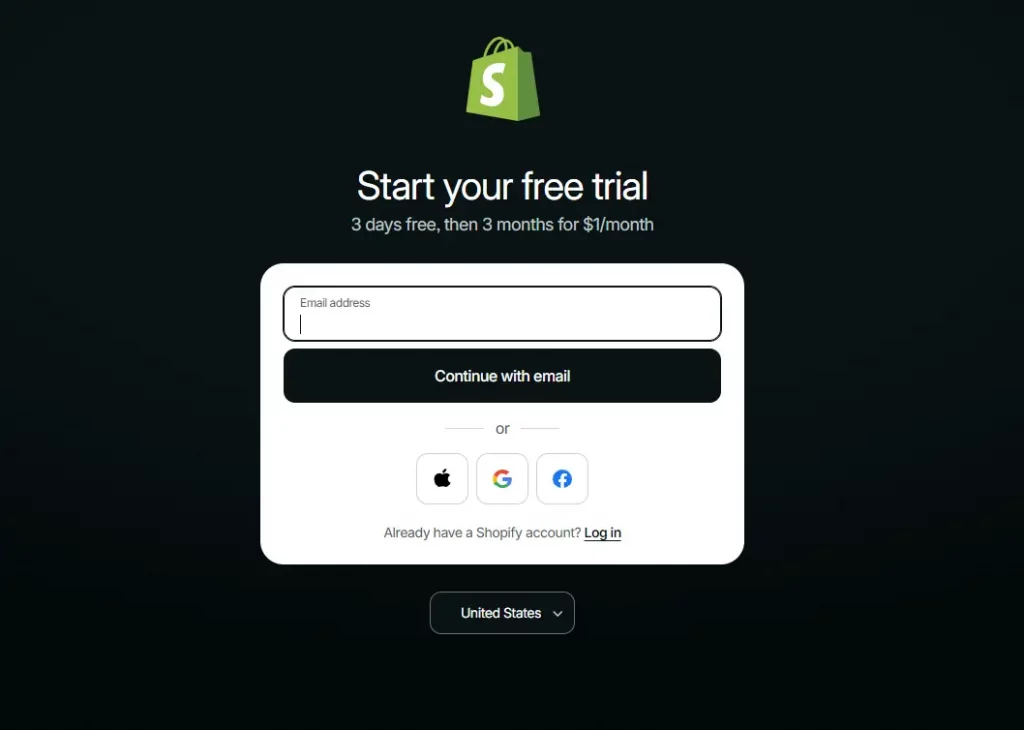
Step 1: Sign Up for a Shopify Free Trial
The first step to start selling on Shopify is to create an account for your online store.
- Go to shopify.com
- Click the Start Free Trial button
- Enter your email address and create a password
- Choose a name for your store — this becomes your ‘myshopify.com’ subdomain
- Answer a few quick questions about your business (you can skip these)
- You are now inside your Shopify admin dashboard

Step 2: Set up your Store’s basic information
Fill in your store’s foundational settings. Go to Settings (bottom-left of your dashboard) and configure the following:
- Store name and contact email
- Store address (used for tax calculations and shipping)
- Default currency and timezone
- Unit system (imperial or metric)
This is also where you can purchase a custom domain or connect one you already own. A custom domain (like yourstore.com) looks far more professional than the default myshopify.com URL. Shopify domains start at around $14 per year.
Step 3: Choose and Customize your Shopify Theme
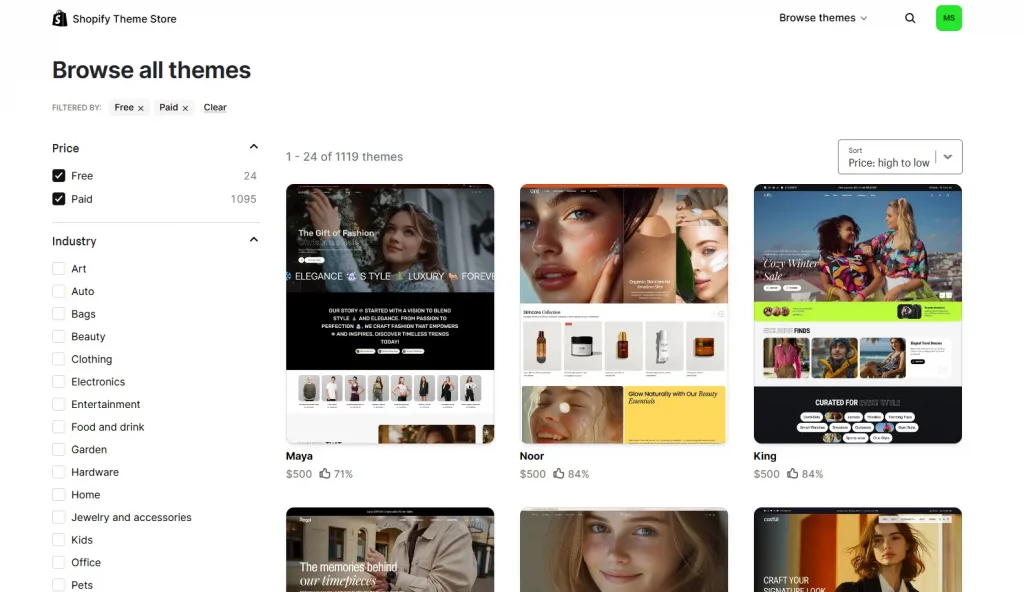
Your theme determines how your store looks. Shopify’s Theme Store offers both free and premium themes, and all of them are mobile-responsive.
How to choose a theme:
- Go to Online Store > Themes in your dashboard
- Click Visit Theme Store to browse options
- Filter by industry, layout style, and price
- Preview themes on both desktop and mobile before deciding
- Click Add to Theme Library when you find one you like

Customizing your theme:
Once your theme is added, click Customize to open the drag-and-drop theme editor. Here you can:
- Upload your logo and set brand colors
- Edit your homepage sections
- Customize fonts and button styles
- Adjust your header and footer navigation
Recommendation: Discover Top 12 Best Free Shopify Templates
Step 4: Add your Products
Products are the heart of your Shopify store. Here is how to add them properly:
- Go to Products in your dashboard
- Click Add product
- Fill in the product title and description
- Upload high-quality product images (at least 3 from different angles)
- Set the price (and compare-at price if on sale)
- Add SKU, barcode, and inventory quantity if applicable
- Set product variants (size, color, etc.) if needed
- Fill in the shipping details (weight, dimensions)
- Optimize the SEO section: edit the page title, meta description, and URL slug
- Click Save
Organizing products into collections:
Collections are like product categories. Go to Products > Collections to group your products by type, season, sale, or any other criterion. Collections make it easier for shoppers to browse your store and help with on-site SEO.
Step 5: Configure Payment Settings
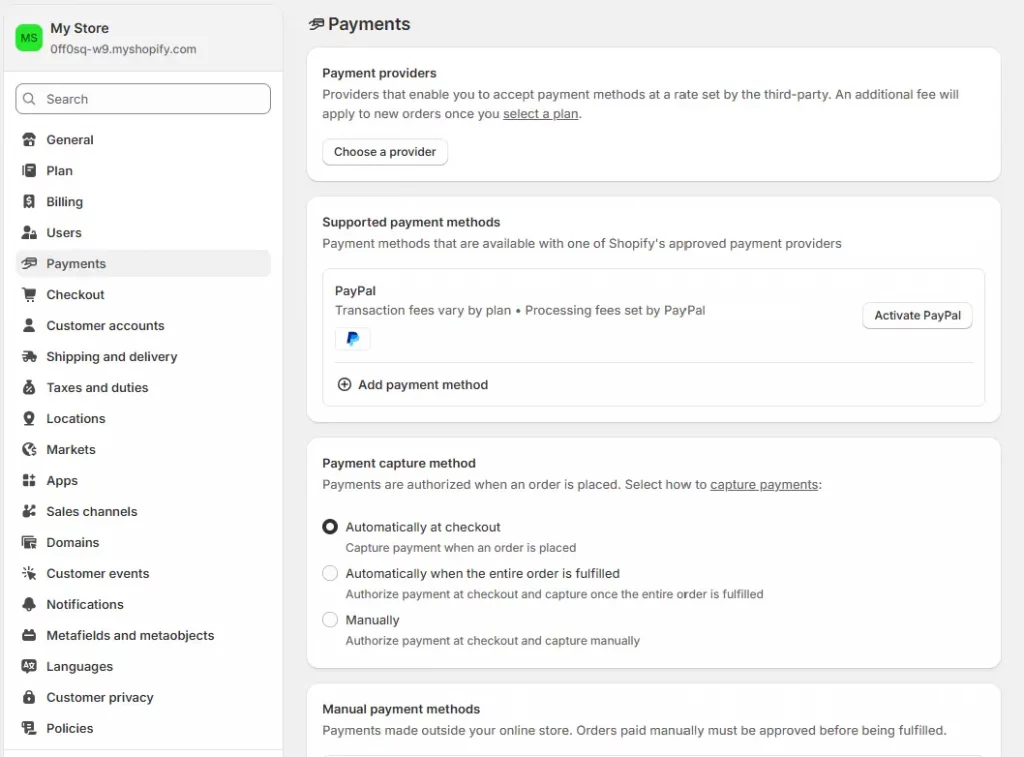
Without payment settings, your store cannot accept money. Here is how to get that set up:
- Go to Settings > Payments
- Enable Shopify Payments if you are in a supported country — this is the fastest and cheapest option, as it eliminates third-party transaction fees
- Alternatively, add PayPal, Stripe, or another third-party payment provider
- Enable accelerated checkouts: Shop Pay, Apple Pay, Google Pay
- Review transaction fees for your chosen plan

Step 6: Set Up Shipping Settings
Shipping is one of the most important factors in customer purchasing decisions. A clear, fair shipping policy builds trust and reduces cart abandonment.
- Go to Settings > Shipping and Delivery
- Create shipping zones (domestic, international)
- Set your shipping rates: free shipping, flat rate, or carrier-calculated rates
- Configure local delivery or pickup if applicable
Step 7: Configure Tax Settings
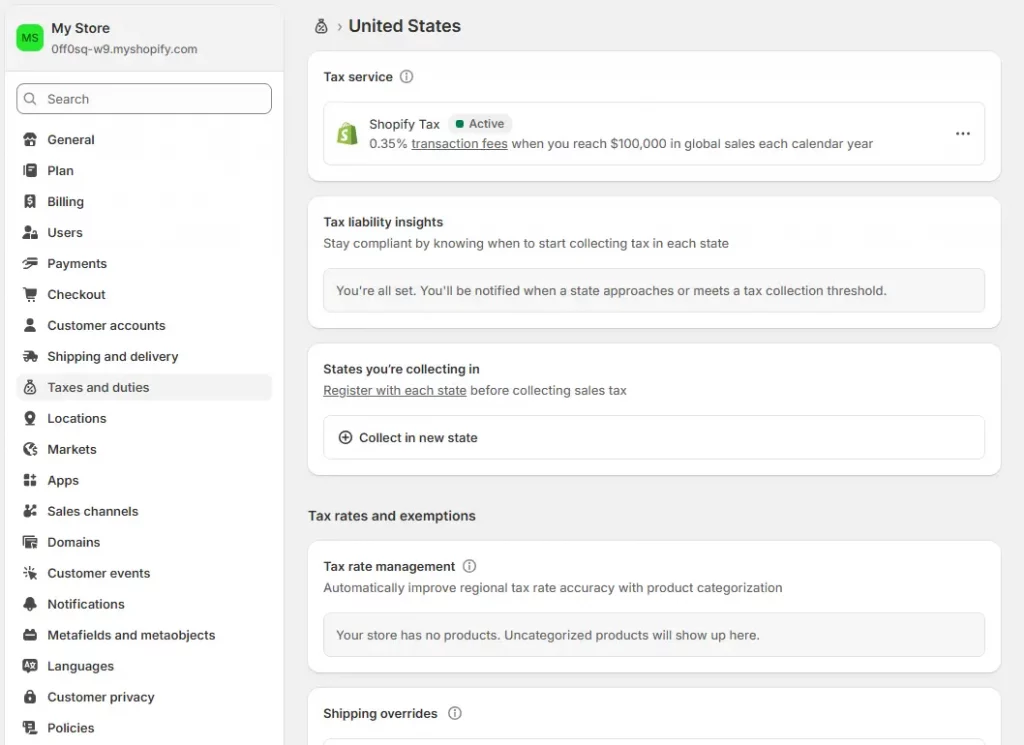
Shopify can automatically calculate sales tax based on your store location and your customers’ locations. This is a significant time-saver, especially if you sell across multiple regions.
- Go to Settings > Taxes and Duties
- Ensure your store’s home country is set correctly
- Enable automatic tax calculation
- Review tax overrides for specific product types if needed (e.g., some food and digital products have different tax rules)

Step 8: Review and Launch your Shopify Store
You are almost there. Before you go live, run through this pre-launch checklist:
Pre-launch checklist:
- Place a test order to confirm your checkout and payment flow work correctly
- Preview your store on mobile to ensure it looks great on smaller screens
- Check that all product pages have images, descriptions, and prices
- Confirm your shipping rates and policies are correct
- Add essential pages: About Us, Contact, Privacy Policy, Return Policy, Terms of Service
- Check your store’s navigation menus (header and footer)
- Review your homepage for any typos or broken elements
Before going live, always place a test order. Shopify has a built-in test mode (Settings > Payments > Bogus Gateway) that lets you simulate a full transaction without processing real payments. Check that confirmation emails are sent correctly and that your order appears in your admin.
Going live:
- Go to Online Store > Preferences
- Scroll down to Password protection
- Uncheck Enable password
- Click Save

Conclusion
Sell on Shopify comes down to a fairly short list of decisions: which plan fits your stage of business, how your storefront and products are set up, and which channels you sell through beyond your own website. The platform handles the technical heavy lifting so the real work is choosing the right setup for your specific business and then optimizing it as real sales data comes in. Start with the free trial, get one channel working well, and expand from there.
If you’re selling on Shopify and need a professional invoice solution, then Vify Shopify Order Printer app is the best choice for you. Try it for free today and experience it for yourself. We’re confident you’ll love it.