Many beginners struggle not because Shopify is difficult, but because they make avoidable mistakes early on. If you’re searching for how to make a Shopify store without running into common pitfalls, this guide is for you. Instead of trial and error, you’ll learn a clear, proven process to set up your store the right way from the start. By following these steps, you can launch faster, avoid costly errors, and build a Shopify store that’s ready to grow and convert.
Why Shopify is the best platform
There are dozens of e-commerce platforms out there, so why make a Shopify store? Because it strikes the right balance between ease of use and serious selling power. Here’s what sets it apart:
- No coding required. Shopify’s drag-and-drop editor means you can customize your store without touching a single line of code.
- All-in-one solution. Hosting, payment processing, inventory management, and shipping tools are all built in — no need to stitch together third-party tools.
- Scales with you. Whether you’re making $100 or $10 million a year, Shopify has a plan that fits.
- Massive app ecosystem. Over 17K+ apps let you extend your store’s functionality.
- Trusted by millions. Shopify powers over 4.5M+ businesses in 175+ countries. The platform is proven and reliable.
How to make a Shopify store
Step 1: Create your Shopify account
The first thing you need to do to make a Shopify store is sign up for an account. Shopify offers a free trial — it’s 3 days free followed by 3 months at a heavily discounted rate — so you can build and explore before committing to a paid plan.
Start your free trial
Head to Shopify.com and click Start For Free. You’ll be asked for:
- Your email address
- A password
- Your store name (don’t overthink this — you can change it later)
Shopify will then ask a few quick questions about your business: what you’re selling, your current revenue, and whether you’re starting a new business or migrating from another platform. Shopify uses this to personalize your dashboard experience.
Choosing the right Shopify plan for your store
Shopify offers several pricing tiers. Here’s a quick breakdown to help you decide:
- Basic ($25/mo): Best for solo entrepreneurs and new stores. Includes all core features, 2 staff accounts, and basic reporting.
- Shopify ($65/mo): For growing businesses. Adds professional reporting, 5 staff accounts, and lower transaction fees.
- Advanced ($399/mo): For scaling stores with high volume. Includes advanced reporting, custom pricing per market.
- Plus ($2,300/month): Best for complex businesses with B2B/wholesale direction. Lowest transaction fees.
If you’re just starting out, the Basic plan is enough. You can always upgrade as your business grows.

Step 2: Configure your Shopify store settings
Before you start adding products or designing your storefront, it’s worth spending a few minutes getting your basic settings right. This saves headaches later and ensures your store functions correctly from day one.
Store name, currency, and timezone
Navigate to Settings > General in your Shopify admin. Here you can update:
- Your store name (the public-facing name customers see)
- Store contact email
- Default currency (make sure this matches your target market)
- Store timezone (important for accurate analytics and order timestamps)
Connecting a custom domain to your store
Your default Shopify URL (yourstore.myshopify.com) is functional, but a custom domain (yourstore.com) looks far more professional and builds customer trust.
You have two options:
- Buy a domain directly through Shopify (Settings > Domains > Buy new domain). Prices start around $14/year.
- Connect a domain you already own through a registrar like GoDaddy, Namecheap, or Google Domains.
Setting up taxes and shipping zones
Taxes and shipping are two areas where beginners often feel stuck. Don’t worry — Shopify handles a lot of this automatically. Navigate to Settings > Taxes and duties and Shopify will auto-configure basic tax rates based on your store location and where you’re selling.

For shipping, go to Settings > Shipping and delivery. Set up at least one shipping zone covering your primary market. You can choose flat rates, weight-based rates, or carrier-calculated rates (available on higher plans).
Step 3: Pick a Shopify theme and customize your store design
Your theme is the visual backbone of your store. It controls your layout, fonts, color scheme, and how customers navigate your site. The good news is that even Shopify’s free themes are polished, mobile-responsive, and professionally designed.
Free vs paid Shopify themes — which should you choose?
Shopify’s Theme Store offers both free and paid options. Here’s how to think about it:
- Free themes (Dawn, Sense, Craft, etc.): More than sufficient for most new stores. They load fast, convert well, and are regularly maintained by Shopify’s own design team.
- Paid themes ($100–$500 one-time): Best for stores in competitive niches where design differentiation matters, or if you need advanced features like mega menus, quick-buy options, or complex filtering out of the box.
To browse themes, go to Online Store > Themes > Visit Theme Store. Filter by industry, catalog size, or features to find a theme that fits your brand.
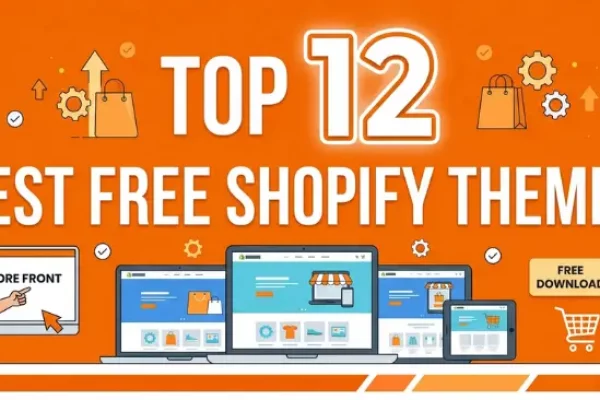
🌟 Don’t know which theme is suitable for your online store? Discover Top 12 Best Free Shopify Templates

How to customize colors, fonts, and layout
Once you’ve chosen a theme, click Customize to open Shopify’s visual editor. From here you can:
- Change your color palette to match your brand
- Set your typography (heading font, body font)
- Reorder, add, or remove sections on your homepage
- Edit your header and footer (navigation links, social icons)
- Customize individual pages like collections and product pages
The editor is live — every change you make is previewed in real time on the right side of the screen. No coding required.
Uploading your logo and brand assets
Go to the Header section in the theme editor and upload your logo. Shopify accepts PNG (recommended for transparent backgrounds), JPG, and SVG files. Aim for a logo that’s at least 400px wide for crisp display on retina screens.
Step 4: Add products to your Shopify store
This is where your store comes to life. Well-presented products are the single biggest driver of conversions — so take your time here.
Writing product titles and descriptions
Your product title should be clear, descriptive, and keyword-rich. Think about what your customer would type into Google when looking for this product.
For product descriptions, avoid generic manufacturer copy. Instead, write descriptions that:
- Lead with the key benefit (not just the feature)
- Answer the most common questions a customer might have
- Use natural language your target customer actually uses
- Include relevant keywords without stuffing

Uploading product images
High-quality images are non-negotiable in e-commerce. Shopify recommends:
- Minimum size: 800x800px (for zoom functionality)
- Recommended: 2048x2048px for crisp display on retina screens
- Format: JPEG for photos, PNG for graphics with transparency
- Consistency: Use the same background color (white or light gray is standard) across all product images for a professional look
Upload multiple images per product — show front, back, detail shots, and lifestyle images. The more visual context you give buyers, the more confident they feel.
Setting up product variants (size, color, etc.)
If your product comes in multiple options — sizes, colors, materials — use Shopify’s Variants feature. On the product page, scroll to the Variants section and add your options (e.g., Size: S, M, L, XL). Shopify will generate a variant for each combination automatically.
Organizing products into collections
Collections are groups of products that you curate for customers — for example, “Summer Sale”, “Men’s Shoes”, or “Under $50”. They make your store easier to browse and are essential for your navigation menu.
To create a collection, go to Products > Collections > Create collection. You can build collections manually (adding products one by one) or automatically (using rules like product tag, price, or vendor).
Step 5: Set up payments and checkout on your Shopify store
Your store might be very attractive, but if checkout doesn’t work, your effort to make a Shopify store becomes useless. Getting payments right is critical.
Enabling Shopify Payments vs third-party gateways
Shopify Payments is Shopify’s built-in payment processor. It accepts all major credit cards, Apple Pay, Google Pay, and Shop Pay. The biggest advantage: zero additional transaction fees (you only pay the standard card processing rate).
If Shopify Payments isn’t available in your country, or if you prefer a different provider, you can connect third-party gateways like PayPal, Stripe, or Authorize.net through Settings > Payments.

Customizing your checkout page
Go to Settings > Checkout to configure how your checkout works:
- Require or make optional the customer’s phone number
- Enable/disable account creation (guest checkout recommended for new stores)
- Add your logo and brand colors to the checkout page
- Set up order confirmation and shipping notification emails
Before going live, always place a test order. Shopify has a built-in test mode (Settings > Payments > Bogus Gateway) that lets you simulate a full transaction without processing real payments. Check that confirmation emails are sent correctly and that your order appears in your admin.
Step 6: Launch your Shopify store
The final step in the process of learning how to make a Shopify store is here. Before going live, take your time to run through all the above steps and double-check all your settings.
Removing the storefront password
By default, all new Shopify stores are password-protected — visitors see a login screen instead of your store. To go live, you need to remove this. Navigate to Online Store > Preferences > Password protection and uncheck Restrict access to visitors with the password. Click Save. Your store is now live.
Announcing your store launch on social media
You have a great time learning how to make a Shopify store, so don’t launch silently. Even if you have a small following, announce your store on every channel you’re active on — Instagram, TikTok, Facebook, LinkedIn, wherever your audience lives. Create a launch post with your store URL, a brief description of what you sell, and ideally a photo of your products.
Consider offering a launch discount (10–15% off) for the first 48 hours to create urgency and capture your first customers while their excitement is high.
Conclusion
Learning how to make a Shopify store is not just about completing a checklist — it’s about building a solid foundation for a business that can grow and scale over time. By following the steps in this guide, you can confidently make a Shopify store that is not only functional but also optimized for conversions, user experience, and long-term success. The key is to start simple, avoid common mistakes, and continuously improve as you learn what works. With the right approach, your Shopify store can quickly evolve from a basic setup into a profitable online business.
If you’re selling on Shopify and need a professional invoice solution, especially one that’s easy to customize without any coding skills, then Vify’s Shopify Order Printer app is the best choice for you. Try it for free today and experience it for yourself. We’re confident you’ll love it.