You have something to sell, but figuring out how to get online can feel overwhelming with all the technical noise out there. The good news is, you can build a website on Shopify without coding skills, design experience, or complicated setup. As one of the most trusted platforms powering millions of businesses worldwide, Shopify makes it easy for beginners. In this guide, you’ll learn how to make a website on Shopify step by step so you can start selling faster and grow with confidence today.
What you need before building a Website on Shopify
Before you open a browser and sign up, spend 15 minutes getting organized. Having the right things in place will make the process smoother. Here’s what to prepare when you decide to build a website with Shopify:
1. A clear idea of what you’re selling
Shopify works for physical products, digital downloads, subscriptions, services, and even event tickets. Know your product type before you start — it will influence which plan and apps you choose.
2. A domain name (or a plan to get one)
You can buy a domain directly inside Shopify (from $14/year), or connect a domain you already own from providers like GoDaddy, Namecheap, or Google Domains. Either way, pick something short, memorable, and easy to spell.
3. Basic brand assets
Have these ready before you start designing: a logo (even a simple text logo is fine), your primary brand colors, product photos or images, and a short brand tagline or description.
4. The right Shopify plan
Shopify currently offers four main plans:
- Basic ($25/month): Best for new stores just starting out. Includes everything you need to launch.
- Grow ($65/month): Best for growing stores. Adds professional reports and lower transaction fees.
- Advanced ($399/month): Best for scaling stores with high volume. Offers advanced reporting and the lowest transaction fees.
- Plus ($2,300/month): Best for complex businesses with B2B/wholesale direction.
All plans come with a 3-day free trial. Start with Basic unless you have a specific reason to upgrade.

Build a website on Shopify
Step 1 — Sign Up and Start Your Free Trial
The first step to build a website on Shopify is creating your account. Go to shopify.com and click “Start free trial.” You’ll be asked to enter your email address, create a password, and give your store a name.
Your store name becomes your default Shopify URL (e.g., yourstore.myshopify.com). This internal URL stays the same forever, even after you connect a custom domain — so don’t worry too much about making it perfect.
Once you’re in, you’ll see the Shopify admin panel. The left sidebar is your command center. Here’s what each section does:
- Orders: Track and fulfill customer purchases.
- Products: Add and manage everything you sell.
- Online Store: Design your website, manage pages, write blog posts.
- Settings: Configure payments, shipping, taxes, domains, and more.
Shopify also shows a setup checklist on your home screen. It’s a helpful guide that walks you through each major task in order — you can follow it directly or use this guide.
Step 2 — Choose and Customize a Shopify Theme
Your theme controls how your store looks. Shopify has a Theme Store with various professionally designed themes. This is where your store’s first impression gets built.
Free vs. paid themes
Shopify offers 24 free themes and 1K+ paid themes. They’re clean, fast, and well-suited for new stores. Paid themes range from $100 to $500 (one-time purchase) and typically offer more layout options, advanced filtering, and richer section variety. For most beginners, a free theme is enough to launch professionally.
🌟 Don’t know which theme is suitable for your online store? Discover Top 12 Best Free Shopify Templates

Customizing your theme
Once you’ve selected a theme, click “Customize.” This opens Shopify’s visual editor — no code required. The editor is split into two panels: your live store preview on the right, and a panel of “sections” on the left.
Sections are modular blocks you can add, remove, rearrange, and configure. Common sections include a hero banner, featured collection, testimonials, image-with-text blocks, and an email signup form. Click on any element in the preview to edit it directly.
Uploading your logo and setting brand styles
In the theme editor, navigate to “Theme settings” (usually at the bottom of the left panel). From here you can: upload your logo, set your primary and secondary colors, choose your body and heading fonts, and control button styles. Apply your brand colors and fonts consistently — this is what makes a store look professional rather than generic.
Why mobile-responsive design matters
All Shopify themes are mobile-responsive by default, meaning they automatically adjust for smartphones and tablets. This matters for two big reasons: over 70% of ecommerce traffic now comes from mobile devices, and Google uses mobile-first indexing — meaning your mobile site is what Google primarily uses to determine your search rankings.
Step 3 — Add Your Products or Services
How to add a product
Every product page has the following key fields:
- Title: Be descriptive and include your main keyword naturally.
- Description: Explain what the product is, who it’s for, and why it’s great. Use short paragraphs and bullet points for scannability.
- Images: Upload high-quality photos. Use at least 3–5 images per product (front, back, detail, lifestyle).
- Price: Set your price and, optionally, a “Compare at” price to show a crossed-out original price.
- Variants: If your product comes in different sizes, colors, or materials, add variants. Shopify handles inventory per variant.

Organizing products into collections
Collections are like categories. You can create collections like “New Arrivals,” “Summer Sale,” or “Best Sellers.” Products can belong to multiple collections. Collections appear in your navigation menu and make it easier for customers to browse your catalog.
SEO-optimizing your product pages
Scroll to the bottom of each product page to find the “Search engine listing preview” section. Here you can edit:
- Page title: Keep under 60 characters. Include your main product keyword.
- Meta description: Write a compelling 150–160 character summary that includes the keyword and a clear benefit.
- URL handle: Make it short and keyword-rich (e.g., /products/handmade-leather-wallet).
Step 4 — Set Up Key Pages beyond your Product Catalog
When you make a website on Shopify, your store is truly visible. Customers want to know who you are, what you are selling, why they can trust you, and find answers before they buy. The right pages build that trust.
Homepage — your most important page
Your homepage has one job: convince visitors to stay and explore. Above the fold (what’s visible without scrolling), you need: a clear headline that explains what you sell, a compelling hero image or video, and a strong call-to-action button (e.g., “Shop Now” or “View Collection”).
Essential pages every store needs
- About page: Tell your brand story. Who are you, why did you start this, and what do you stand for?
- Contact page: Include a contact form and your email address. A phone number and physical address build additional trust.
- FAQ page: Answer your most common pre-purchase questions. This reduces support tickets and increases conversions.
- Shipping & Returns policy: Shopify provides a policy generator. A clear policy reduces cart abandonment significantly.
Step 5 — Configure Payments, Shipping, and Taxes
Before you completing build a website on Shopify, make sure customers can actually pay you — and know what it will cost to receive their order. Go to Settings to configure all three.
Setting up payments
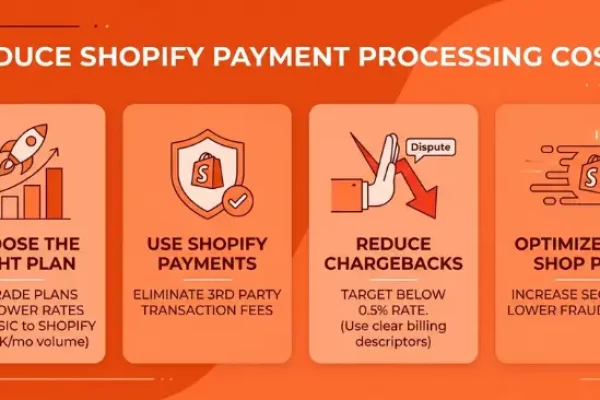
Shopify Payments is the built-in payment processor and the easiest option. It’s available in most countries and accepts all major credit cards, Apple Pay, and Google Pay. Using Shopify Payments also waives the additional transaction fee Shopify charges when using third-party gateways.
If Shopify Payments isn’t available in your country, or if you prefer alternatives, you can connect PayPal, Stripe, or any of 100+ supported payment gateways.

Setting up shipping
Go to Settings > Shipping and delivery. Create shipping zones for the regions you ship to (e.g., Domestic, International). For each zone, set your rates: free shipping, flat rate, or weight-based rates. If you’re using Shopify Shipping (available in select countries), you can also print discounted shipping labels directly from your admin.
Configuring taxes
Shopify can automatically calculate taxes based on your store’s location and the customer’s shipping address. Go to Settings > Taxes and duties, enable automatic tax calculation, and review whether your products are taxable. For most new stores, the defaults work well. Consult a local accountant if you’re unsure about your tax obligations.
Step 6 — Connect Your Domain and Launch Your Store
You’re almost ready. The final steps before you officially build a website on Shopify and go live are connecting a real domain and running a pre-launch check.
Connecting your domain
In your Shopify admin, go to Settings > Domains. You have two options:
- Buy a domain on Shopify: Quick and easy. Shopify handles all the DNS configuration automatically. Domains start at around $14/year for ‘.com’.
- Connect a third-party domain: If you already own a domain, click “Connect existing domain” and follow the DNS instructions to point it to Shopify. This typically takes up to 48 hours to propagate.
Going live
By default, Shopify hides your store behind a password page so only you can see it while you’re building. To go live, go to Online Store > Preferences > Password protection and uncheck “Restrict access to visitors with the password” > Save — and your store is live.
Conclusion
Building an online store used to require a developer, a designer, and a significant budget. But not anymore. Now you can easily build a website on Shopify that looks professional, performs fast, and sells effectively — entirely on your own, in a single day.
The best time to build your store was yesterday. The second best time is right now. Head to shopify.com and start your free trial today — your future customers are already searching for what you sell.
If you’re selling on Shopify and need a professional invoice solution, especially one that’s easy to customize without any coding skills, then Vify’s Shopify Order Printer app is the best choice for you. Try it for free today and experience it for yourself. We’re confident you’ll love it.