Most people who want to start an online business get stuck in endless research instead of taking action. If you’ve been wondering how to build a Shopify store but feel overwhelmed by technical details or conflicting advice, this guide is for you. You’ll learn exactly how to build a Shopify store from zero — step by step, with no prior experience required. As one of the most beginner-friendly yet powerful platforms, Shopify makes it easy to create a store, launch quickly, and focus on what really matters: growing your business and making your first sales.
4 Things to Decide before building a Shopify store
The fastest way to build a store on Shopify is to walk in prepared. Here are the four things to lock in before you build a Shopify store:
1. What you’re selling (and to whom)
Sounds obvious, but the clearer you are here, the faster every other decision becomes. Know your product type (physical, digital, or service), your target customer, and your price point. These three factors will determine your plan, your theme, and even which apps you need.
2. Your domain name
Your domain is your store’s address on the internet. Aim for something short, easy to spell, and free of hyphens or numbers. You can purchase a domain directly inside Shopify (from $14/year) or connect one you already own from providers like Namecheap, GoDaddy, or Google Domains.
3. Your brand basics
Before you touch the theme editor, have these ready: a logo, your brand colors, and product photos. If your product photos aren’t ready, use high-quality stock images as temporary placeholders rather than launching with blurry or inconsistent visuals.
4. Your Shopify plan
- Basic ($25/month): Best for new stores just starting out. Includes everything you need to launch.
- Grow ($65/month): Best for growing stores. Adds professional reports and lower transaction fees.
- Advanced ($399/month): Best for scaling stores with high volume. Offers advanced reporting and the lowest transaction fees.
- Plus ($2,300/month): Best for complex businesses with B2B/wholesale direction.
All plans come with a 3-day free trial. Start with Basic unless you have a specific reason to upgrade.

How to Build a Shopify Store
Step 1: Create your Shopify Account
Head to shopify.com and click “Start free trial.” Enter your email, create a password, and give your store a name. Shopify will ask a few quick questions about your business — answer or skip them; it doesn’t affect your setup.
Step 2: Choose a Theme
Your theme is the visual foundation of your store. Navigate to Online Store > Themes. Shopify’s Theme Store has 1K+ options — free and paid. Before browsing, ask yourself: What feeling should my store create? Premium? Playful? Minimal? Clinical?
🌟 Don’t know which theme is suitable for your online store? Discover Top 12 Best Free Shopify Templates
After deciding the best theme for your Shopify store, click “Customize” on your chosen theme. The editor opens with your store preview on the right and a panel of controls on the left. Everything is built with “sections” — modular blocks you can add, remove, and rearrange. Click any element on the preview to edit it in place.
The most impactful customizations to make first:
- Upload your logo (Theme settings > Logo)
- Set your colors (Theme settings > Colors)
- Choose your fonts (Theme settings > Typography)
- Edit the hero banner with a strong headline and a clear call-to-action button
- Check mobile view by toggling the mobile preview icon at the top of the editor
Step 3: Add Products
Go to Products > Add product. This is the most important section of your store.

Writing product titles and descriptions that convert
Your product title should be descriptive and searchable. Instead of “Candle,” write “Lavender + Eucalyptus Soy Candle — 8 oz Hand-Poured.” Include the material, scent, size, or key attribute that your customer would actually search for.
Your product description is your silent salesperson. Structure it like this:
- Opening hook: Lead with the benefit.
- Key details: Dimensions, materials, what’s included.
- Who it’s for: Help the customer see themselves using it.
- Call to action: Invite them to buy or explore more.
Product images: your most important conversion tool
Upload a minimum of 4–6 images per product: front view, back view, detail shot, lifestyle shot (product in use), and a scale reference if size matters. Name your image files descriptively before uploading (e.g., lavender-soy-candle-front.jpg) and always add alt text inside Shopify — this is critical for both accessibility and SEO.
Variants, inventory, and shipping weight
If your product comes in different sizes, colors, or bundles, use the Variants section. Shopify tracks inventory per variant, which means you’ll always know exactly what’s in stock. For physical products, add a weight — Shopify uses this to calculate real-time shipping rates.
Organizing products into collections
Collections are like categories. Create them by going to Products > Collections. You can create manual collections (you choose which products appear) or automated collections (Shopify adds products automatically based on rules you set, like “All products tagged ‘summer’”). Start with 3–5 collections and grow from there.

Step 4: Build your Shopify Pages
Products make the sale. Pages make the trust. When you build a store on Shopify, your product catalog alone isn’t enough — customers need context, credibility, and answers before they’ll hand over their payment details.
Homepage: your 8-second first impression
You have roughly 8 seconds to convince a new visitor to stay. Your homepage needs to immediately answer three questions: What do you sell? Who is it for? Why should I trust you? Structure your homepage from top to bottom like this:
- Hero section: Bold headline + strong visual + “Shop Now” CTA
- Featured collections: Give visitors a clear path into your catalog
- Social proof: Star ratings, review count, or customer testimonials
- Brand story snippet: 2–3 sentences on who you are and why it matters
- Email capture: Offer a discount or freebie in exchange for an email signup
Contact, FAQ, and policy pages
These three pages reduce purchase friction more than any other non-product content you can create. A clear FAQ page (covering shipping times, return process, sizing guides, etc.) reduces support load and increases checkout confidence. Shopify provides a policy generator (Settings > Policies) for your Refund, Privacy, and Terms of Service pages.
Step 5: Set Up Payments, Shipping, and Taxes
This is the “back-end” section most beginner guides rush through. Go to Settings to configure all three.
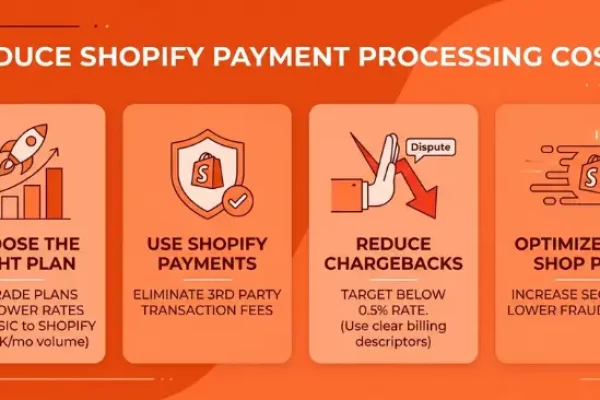
Payments: Shopify Payments vs. third-party gateways
Shopify Payments is built in, requires no additional sign-up, and accepts Visa, Mastercard, Amex, Apple Pay, Google Pay, and Shop Pay.
Shopify Payments is available in the US, UK, Canada, Australia, and several European countries. If it’s not available in your region, PayPal is the most universally trusted alternative. Go to Settings > Payments to activate your chosen gateway.

Shipping
Go to Settings > Shipping and delivery. Create shipping zones for the regions you want to ship to. For each zone, choose your rate type:
- Free shipping: Reduces cart abandonment significantly.
- Flat rate: Simple and predictable. Best for stores with products in a consistent size/weight range.
- Calculated (carrier) rates: Real-time quotes from carriers like USPS, UPS, FedEx. Most accurate for stores with varied product weights.
Taxes
Go to Settings > Taxes and duties. Enable “Charge taxes on products” and turn on automatic tax calculation. Shopify will calculate the correct tax rate based on your store’s location and the customer’s shipping address. For most new stores in the US, this setup is sufficient.
Step 6: Connect Domain and Go Live
Connecting your custom domain
Go to Settings > Domains. You have two paths:
- Buy a domain through Shopify: The easiest option. Shopify configures all DNS settings automatically. Prices start at ~$14/year for ‘.com’.
- Connect an existing domain: Click “Connect existing domain” and follow the instructions to update your DNS records at your current registrar. This usually takes 24–48 hours to propagate fully.

Your pre-launch checklist
Verify all the steps below to build a Shopify store effectively:
- Complete a full test order (including checkout and payment)
- View every page on mobile and desktop
- Test all navigation links and buttons
- Confirm all product prices, variants, and inventory counts are correct
- Review shipping rates and zones
- Check that all policy pages are live and accurate
- Verify your payment gateway is active and configured
- Confirm your custom domain is connected and resolving
- Read through your homepage copy one final time
Go live
Go to Online Store > Preferences. Scroll to the “Password protection” section and uncheck “Restrict access to visitors with the password.” Click Save. Your store is now live and publicly accessible. Congratulations — you just successfully built a Shopify store.
Conclusion
The biggest barrier to launching an online store isn’t technical — it’s the belief that it’s more complicated than it actually is. You now know exactly how to build a Shopify store from the first click to the moment the password comes down and your doors open to the world.
To recap the journey: set up your account, choose and customize a theme that represents your brand, add products with strong titles & descriptions, build the pages that create trust, configure your payments & shipping, connect your domain, and launch.
If you’re selling on Shopify and need a professional invoice solution, especially one that’s easy to customize without any coding skills, then Vify’s Shopify Order Printer app is the best choice for you. Try it for free today and experience it for yourself. We’re confident you’ll love it.